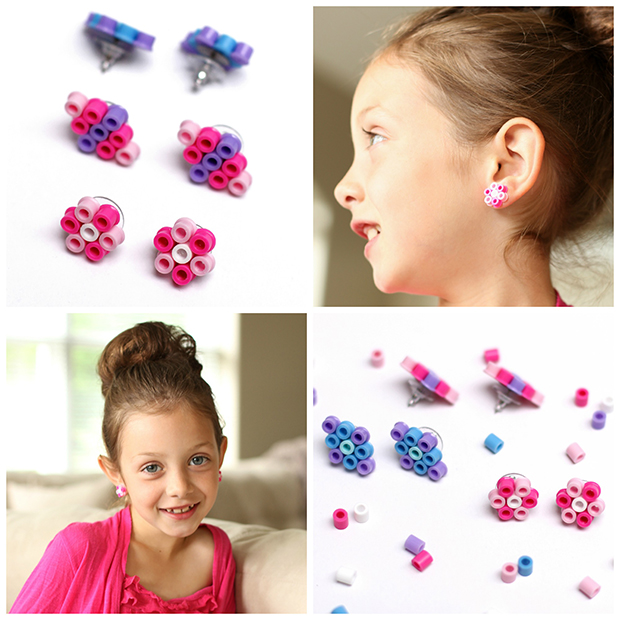
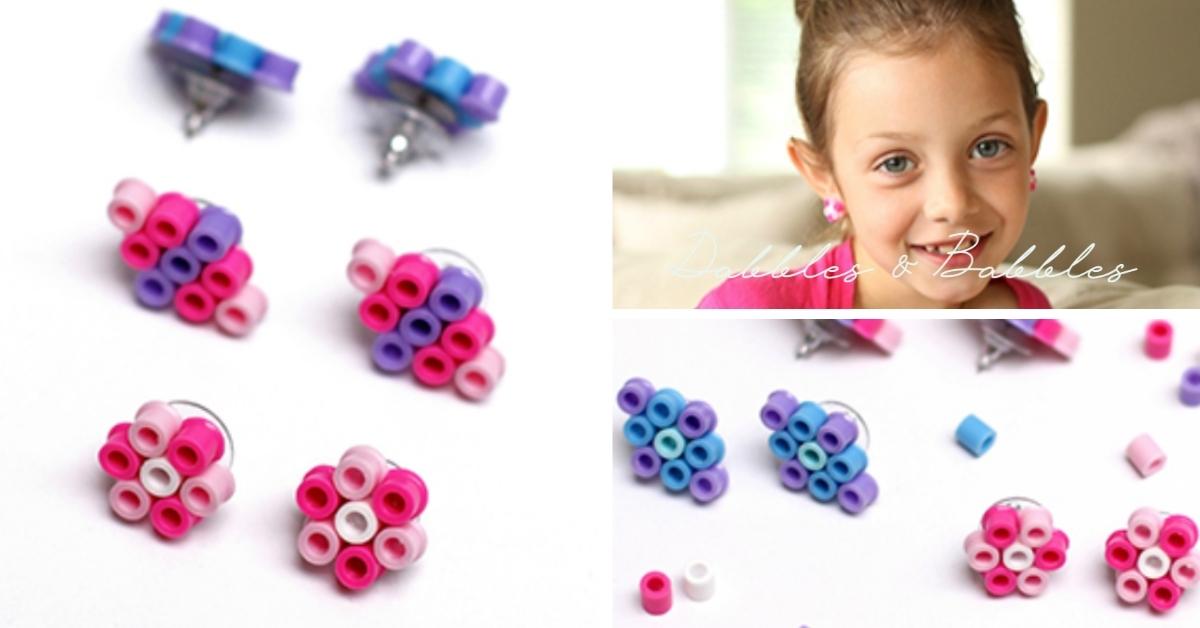
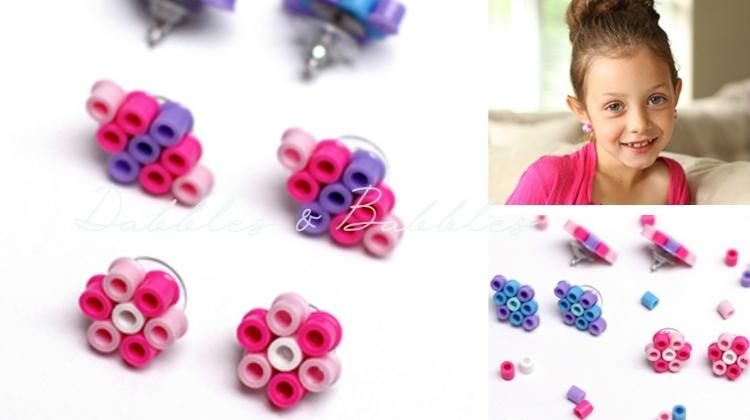
Fun Perler Bead Stud Earrings – We love craft perler beads – you know, those fantastic and inexpensive little beads that can be arranged in any shape or pattern you desire! A little heat, and they stick together like magic! We’ve had a huge tub of them for a couple of years now and we’ve made all kinds of fun projects. My daughter enjoys making cute little purses, shoes and flowers and then gives them away to her friends and classmates. A few weeks ago I had a bunch of toys supplies come in, including stud earring findings and, in all honesty, I totally forgot about them until I was tidying my office yesterday. My intent for these stud findings were to make some cute little earrings for Noelle but I had no concrete plan for them.
At some point yesterday afternoon, I was putting something in Noelle’s room when I saw the big tub of beads and a light bulb went off in my head… fun earrings that Noelle can make herself using perler beads. Mission on! We sat down and started picking out our colours (yes, I wanted to make some too). Being that my daughter is still only 6 years old I wanted to keep the designs petite for her little head but you could make and size and design you like.
Materials:
- Craft perler beads and bead peg board (usually comes with perler bead set)
- Stud earring findings (buy from Michaels or online)
- Iron
- Kitchen parchment paper
- Glue (I used non-toxic Weldbond)
Directions:
- Place the perler beads on the pegboard so the holes in their middles sit on the pegs. Make sure all the beads are touching at least one other bead so they can be fused together.
- Pre-heat the iron to a medium-heat setting. Do not use the steam function.
- Place a piece of kitchen parchment paper over the design and apply the iron to the parchment paper and rub gently for about 15-25 seconds until you can see through the parchment paper that the plastic beads have started melting together.
- Set beads aside with the paper still attached, and allow to cool (5-10 minutes).
- Lift the parchment paper off and check to make sure all the beads are fused together (if they aren’t, repeat step 3 but for a little less time).
- Now take your stud earring base and place a small amount of glue on the end, just enough so that it doesn’t bleed out over the edge of the base too much. Press gently against the back side (the side you used the iron against) and nudge the earring base into your preferred position. Allow to dry completely (I definitely didn’t wait long enough and the finding came off when I tried to put in Noelle’s ear so try to be patient).