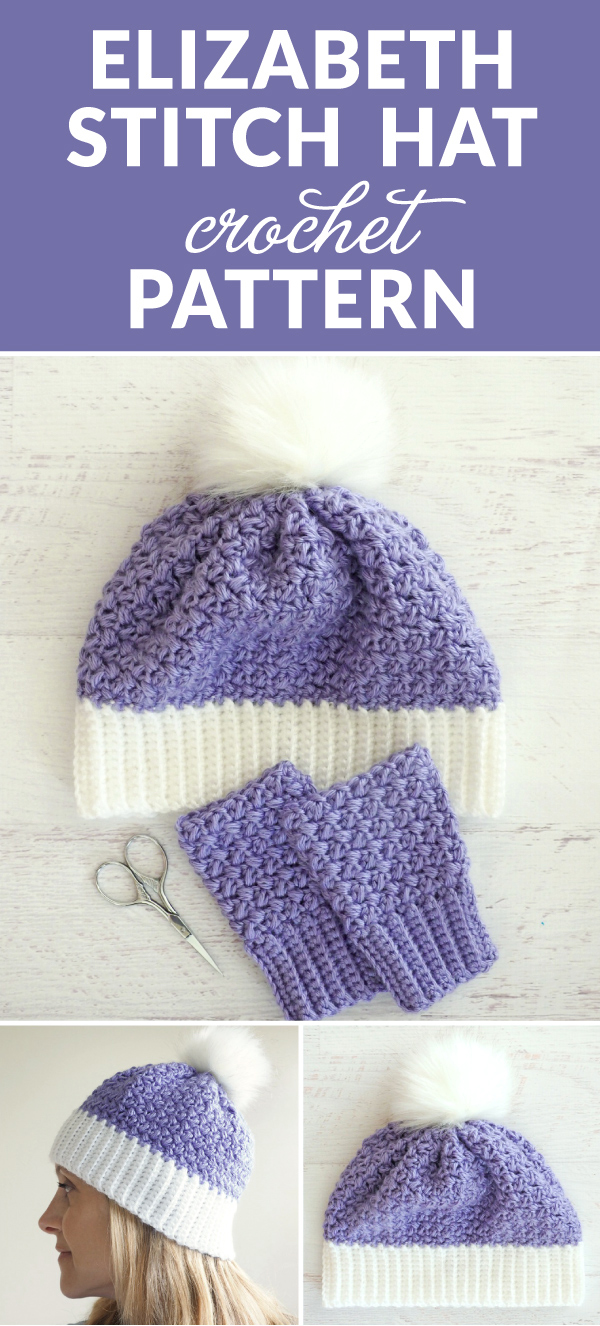
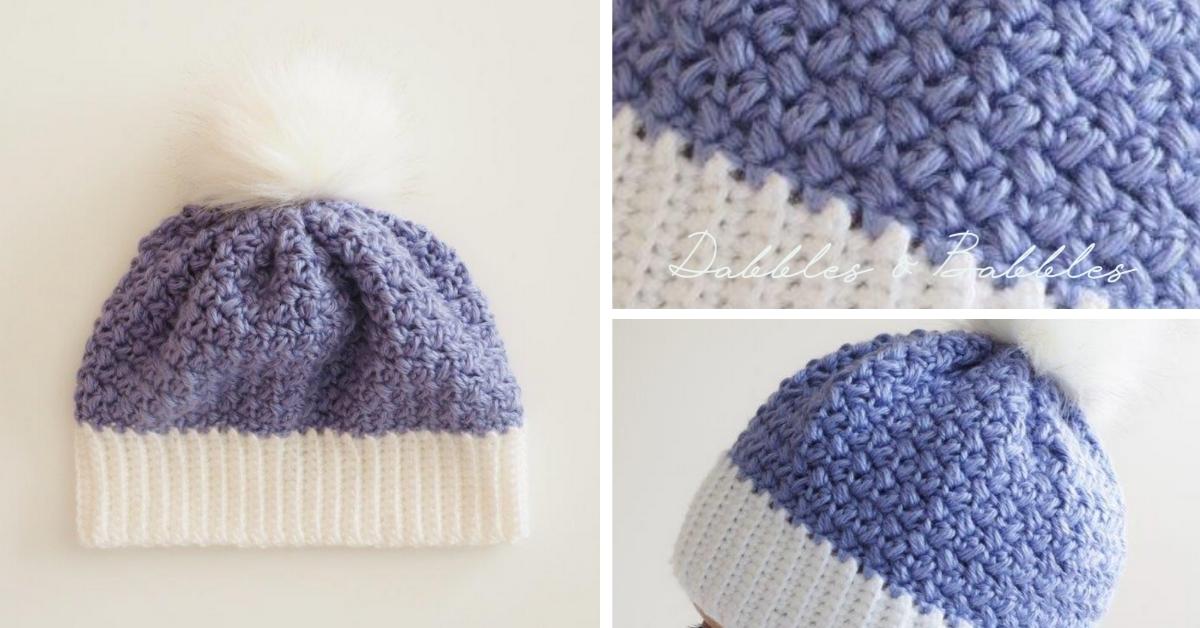
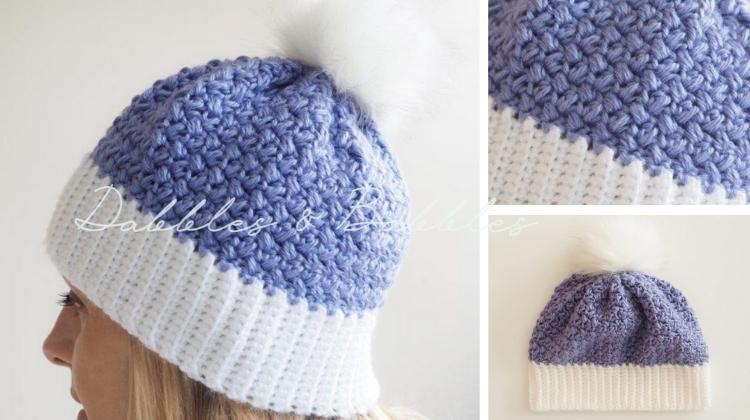
To say we adore this hat is simply an understatement. It uses the Elizabeth Stitch which results in a fun, textured hat you can use anytime. It has two major parts that work beautifully and quickly, plus the faux fur pom hits the home run for us. You can stitch this one with the free pattern below or get the ad-free printable PDF pattern here.
You may have noticed lately that I’ve really fallen in love with the Elizabeth stitch…maybe it’s because it’s just so easy to crochet. Not only that, but it also looks great!
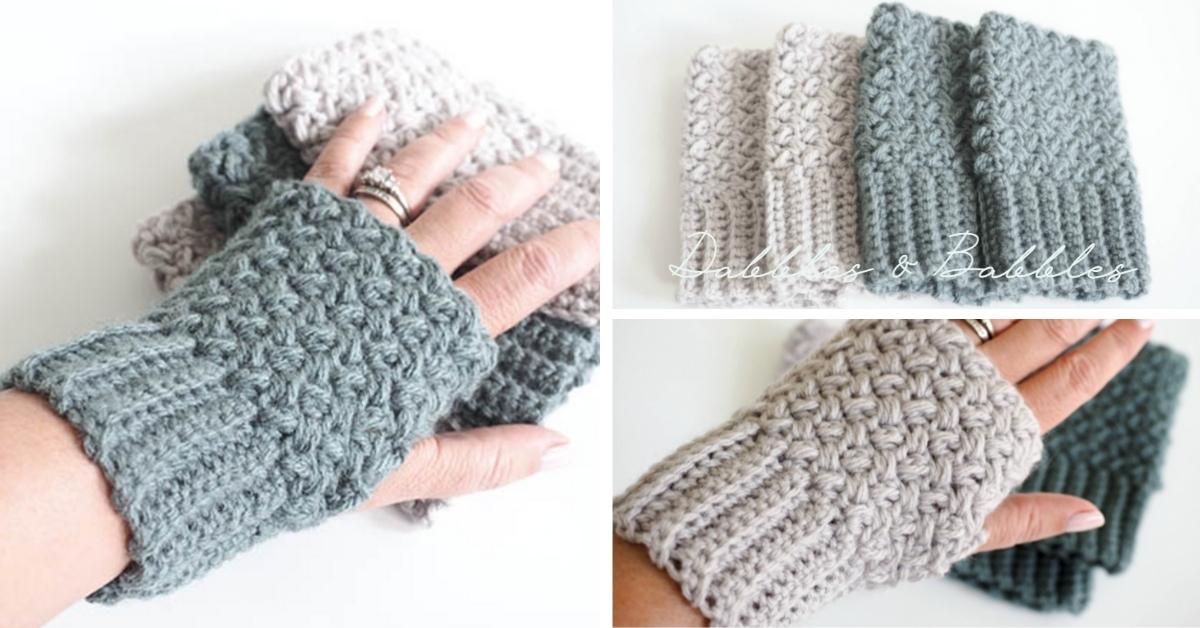
After I created the pattern for the Elizabeth Stitch Fingerless Gloves (which has quickly become one of the top crochet patterns on Dabbles and Babbles), my daughter Noelle ask me if I could make a pair of gloves for her as well as a hat to go with it. I’m always up for a challenge so I decided to give it a try and voila, the Elizabeth Stitch crochet hat was born.
The hat is almost as easy to make as the gloves, you simply need to crochet a little more for the hat. It’s done in two parts, first the crochet ribbing and then the rest of the hat. Finally, you seam the ends together and join the top.
The final pièce de résistance is the adorable faux fur pom-pom which is all the rage this year. Perfect for kids and adults alike, this crochet hat makes a perfect birthday or Christmas gift.
Elizabeth Stitch Crochet Hat Pattern
NOTES: Pattern in U.S. crochet terminology
SKILL LEVEL: EASY
MATERIALS:
- Hook: U.S. 5.0mm
- Yarn: Size 4 worsted weight yarn – Caron Simply Soft in White (90 yards) and Lavender Blue (140 yards)
- Faux Fur Pom Pom (or regular yarn pom pom)
- Darning Needle & Scissors
ABBREVIATIONS:
- st = stitch
- ch = chain
- sl = slip stitch
- sc = single crochet
NOTES:
This crochet hat pattern is worked in two sections, the ribbed cuff and then the rest of the hat (purple part of the hat in the photo). To finish it off, the sides are seamed together and the top is cinched together.
Elizabeth Stitch – see video tutorial here
Insert your hook into next stitch, pull up a loop, yarn over, back into the same stitch and pull up another loop, yarn over and pull through all four loops on the hook. ch 1.
Get the ad-free printable PDF pattern here.
PATTERN:
Crochet Hat Ribbing
Chain 13 stitches.
Row 1: Starting in the 2nd chain from the hook, sc into each stitch until you reach the end of the row, turn.
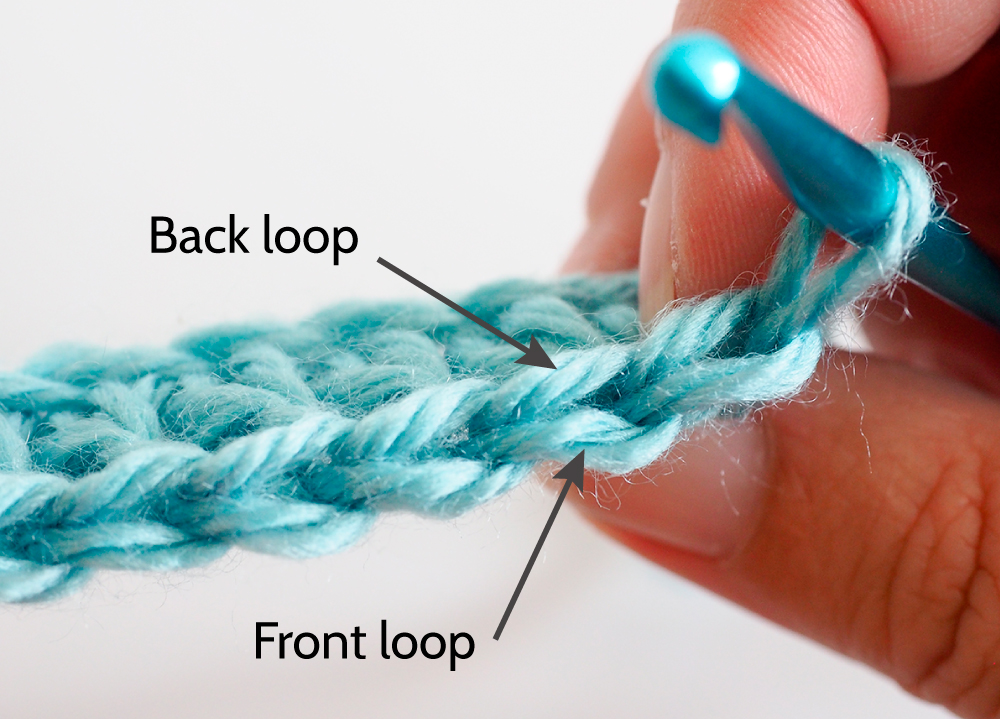
Row 2: Ch1, sc into the back loop in each stitch across the row, turn. (see photo below for help finding the back loop).
Row 3 – 89: Repeat the steps in Row 2 (it should end up approx. 20-21” long)
Turn the ribbed cuff portion you’ve completed. You’ll now start crocheting along the long side of the section you just made.
Upper Hat Portion
Row 1: 1 sc into the end of each row from the cuff, turn.
Row 2: Ch3, 1 Elizabeth Stitch (see above for Elizabeth Stitch instructions) in every other stitch across the entire row, turn.
Row 3: Ch3, 1 Elizabeth Stitch in every other stitch across the entire row with the last stitch being worked under the turning chain, turn.
Rows 4 – 20: Repeat the steps in Row 3. If you would like the hat larger, simply add additional rows.
Finishing
Fold two short edges in half and stitch together using the mattress stitch, using the appropriate yarn color for each section.
Once you’ve seamed up the two edges, get a 24″ piece of yarn the same color as the top of the hat. Using the darning needle with the yarn in it, weave the yarn in and out of the top edge of the hat all the way around (every few stitches) until you’re around the entire top. Cinch the two ends of the yarn together so that the top edge of the hat all comes together. When you’ve got it pulled as tight as you can, knot the yarn together and weave the yarn ends into the hat.
Add a faux fur pom pom to the hat and you are DONE!
Get the ad-free printable PDF pattern here.
If you enjoy crocheting simple shapes like rectangles, you may want to check out our Crochet Anything with Rectangles class where you’ll take the basic shape you already have down pat and turn it into useful, practical, and beautifully professional projects.