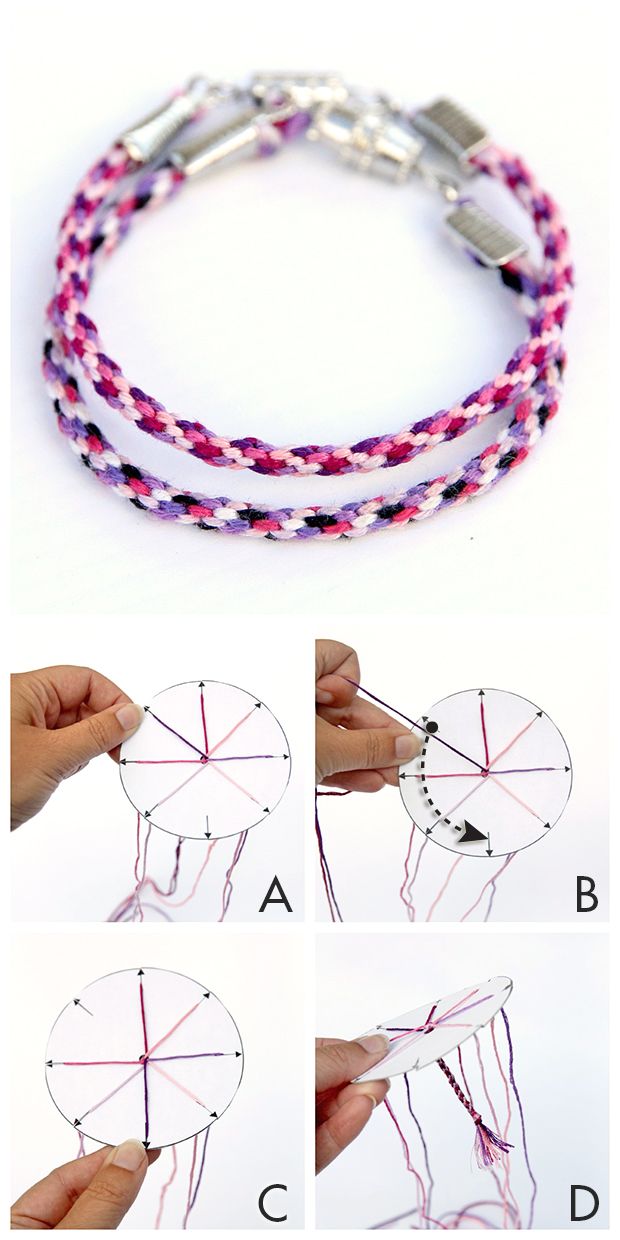
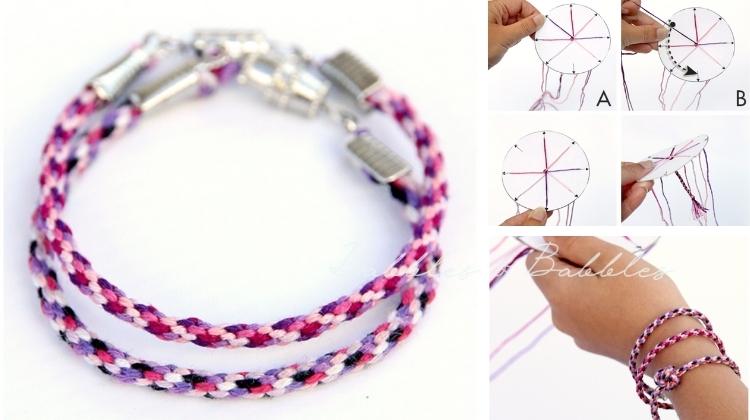
A while back, I tried to teach Noelle how to make friendship bracelets. I used to spend hours making these when I was a kid. It didn't go overly well with Noelle. I'm not sure if she was still a bit too young or she just wasn't interested. Determined to find something easier for her to make, I found some Pinterest posts on how to make woven bracelets (I wanted to give credit to one great post in particular but it's a broken link now). I got out an old cereal box and some embroidery thread and sat down to test it out – it worked! Inspired by this super easy friendship bracelet idea, I created a simple template that you can print out, glue onto some light cardboard (cereal boxes or pasta boxes work well), cut out and you're ready to go.
Oh, and I have no idea what the real name is for these sorts of bracelets but Noelle and I named them Jellyfish Bracelets because as you're making them, they look like jellyfish (see photos below).
Materials:
- Light cardboard box that you can cut up (cereal, oatmeal or pasta boxes for example)
- Download Template
- Paper
- Embroidery floss – Up to 7 colours
- Glue
- Scissors
- Any jewellery findings if you want to make it removable, otherwise just tie the bracelet right on your wrist
Instructions:
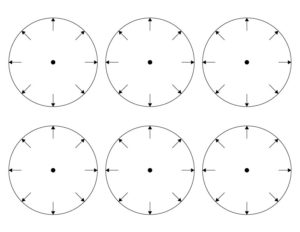
- Download the printable template and print onto a piece of paper
- Cut out one of the circles from the paper and glue onto a piece of your cardboard (make sure to get the edges of the circle covered really well with glue). Let the glue dry completely. (If you aren't patient enough to do the whole glue thing, you could just copy the template design directly onto the cardboard with a pen).
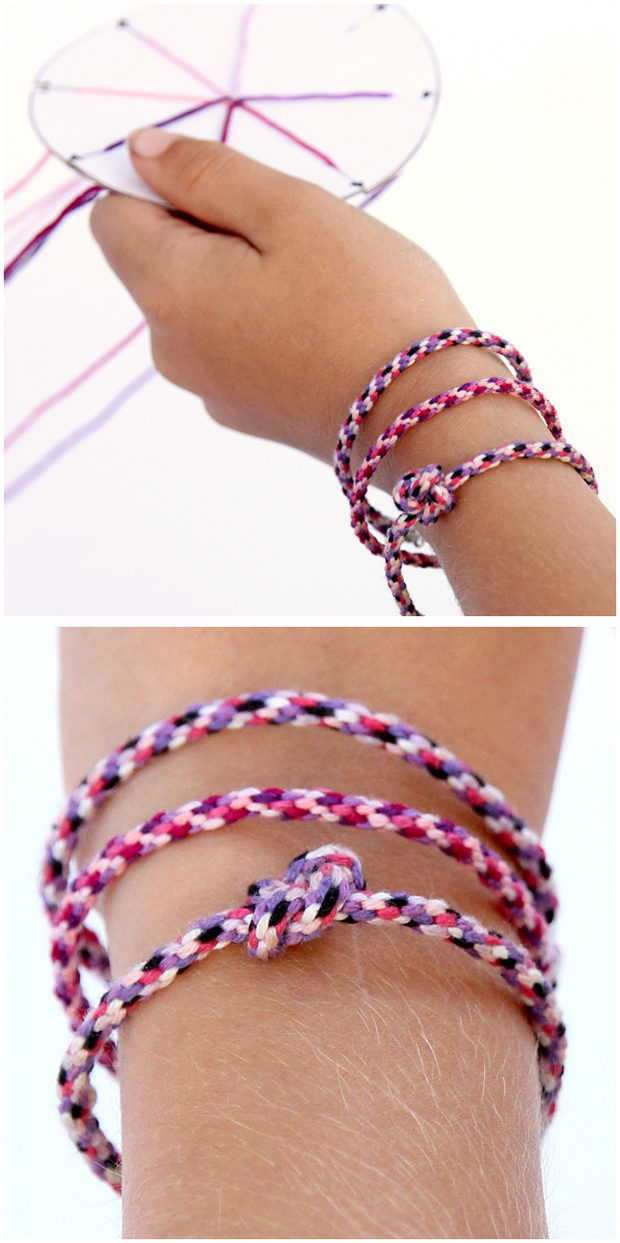
- Now cut the cardboard with the paper glued onto it around the edge of the circle to where the tips of the arrow heads are. Cut a slit in each line that has the arrow head, about the same distance as the line itself. Use the sharp end of your scissors to poke a hole in the middle, approximately the size of the circle.
- Now grab your embroidery floss and cut either 7 or 14 pieces (2 of each colour) all 18″ long for adults or about 14″ for smaller kids. I find that doubling up the floss (using 14 pieces) is thicker and goes a bit faster.
- Knot together all the embroidery thread at one end so that there is still a little tail of ends.
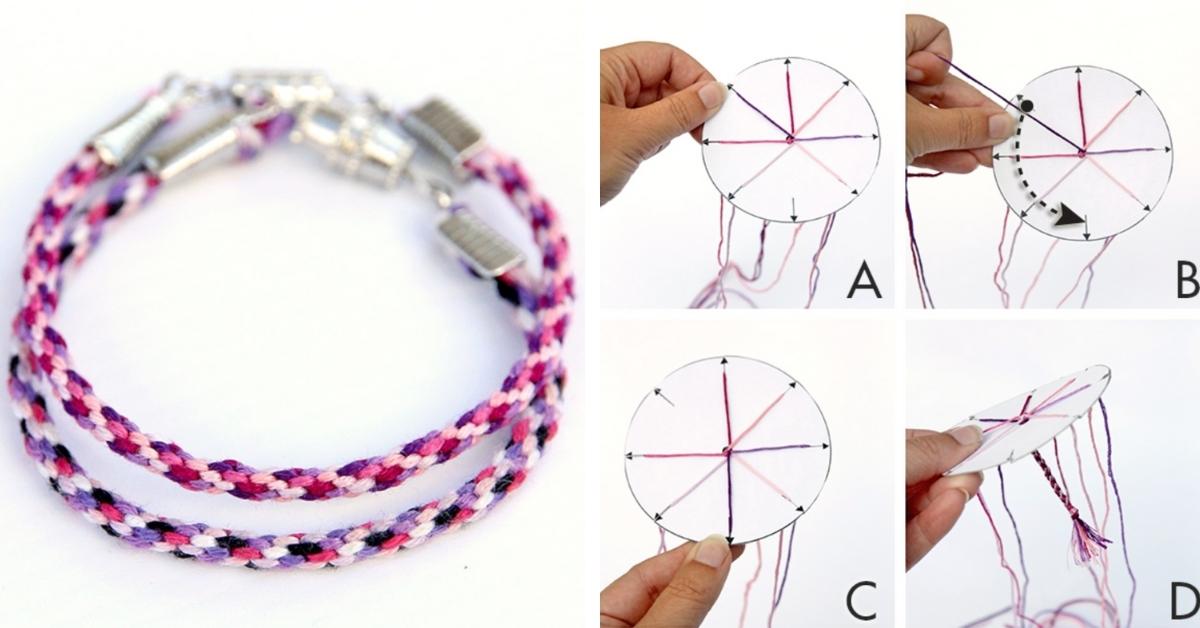
- Careful thread the ends of all the thread through the hole so that the knot is on the back side of your template/cardboard. Put one piece of each thread (2 pieces per slit if you're using 14 pieces of floss) into each slit so that it's snug into place – see Photo A.
- Now, turn the template so that the empty space is pointing to your chest. Count 3 slit spaces to the left from there (approx. the 10:00 pm position if it were a clock). Take that piece(s) out of the slit and place into the empty space that is facing your chest – see Photos B and C.
- Turn the template counterclockwise so that the empty space is again pointing to your chest and repeat step 7.
- Keep your thumb gently over the hole in the middle to make sure that the bracelet remains in position while you're moving the threads around. You'll also want to run your fingers through the threads underneath the template from time to time to prevent the threads from getting tangled.
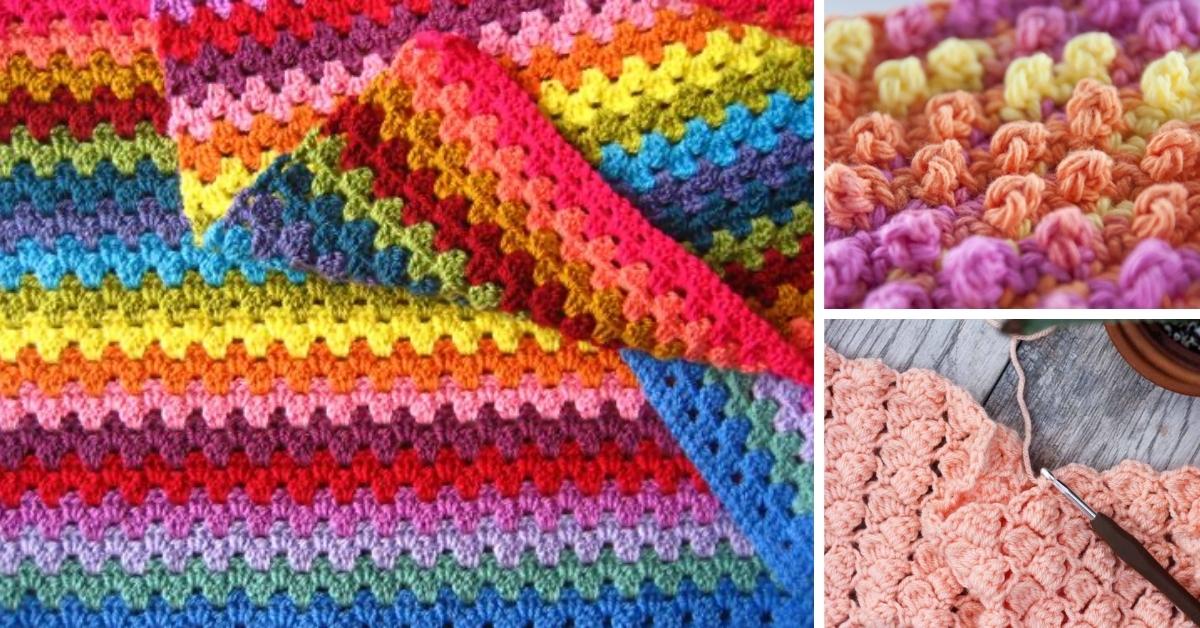
- Eventually you'll start seeing the bracelet appear underneath once you get going – see Photo D. Keep going until you've reached your desired length. Tie off the end and finish off as you please (I added some clasps so my daughter's bracelets so she could take hers on and off but you can keep things simple and just tie the two ends of your bracelet together).
Looking for more great kids stuff: 10-minute superhero costume, printable robot colouring page , DIY I spy game, good karma cards, family movie night tickets, blank faces coloring pages, indoor fairy garden
Thanks for reading!
~ Jamey