Crochet Christmas Stocking Pattern – While I was off recovering from knee surgery, I had a lot of time to sit around. Of course, I had prepared for my downtime by making a little bit of yarn and hooks to keep beside my bed so that I could crochet.
One day, not too long after my surgery, my daughter suggested that I crochet a Christmas stocking…for our cat (um ya, our cat). While I’m pretty sure our cat had no need or desire for a stocking, I liked the idea of trying something new to crochet. I have to say that I’ve never been a huge fan of crochet socks and slippers – mainly because of all the counting you usually have to do.
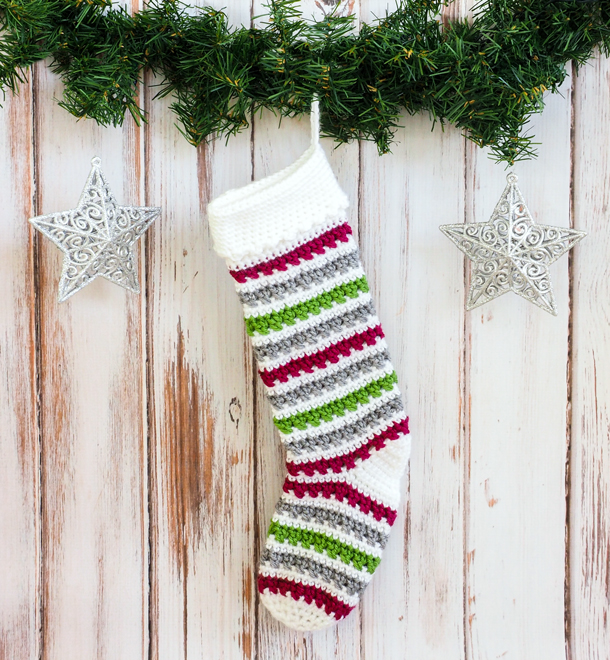
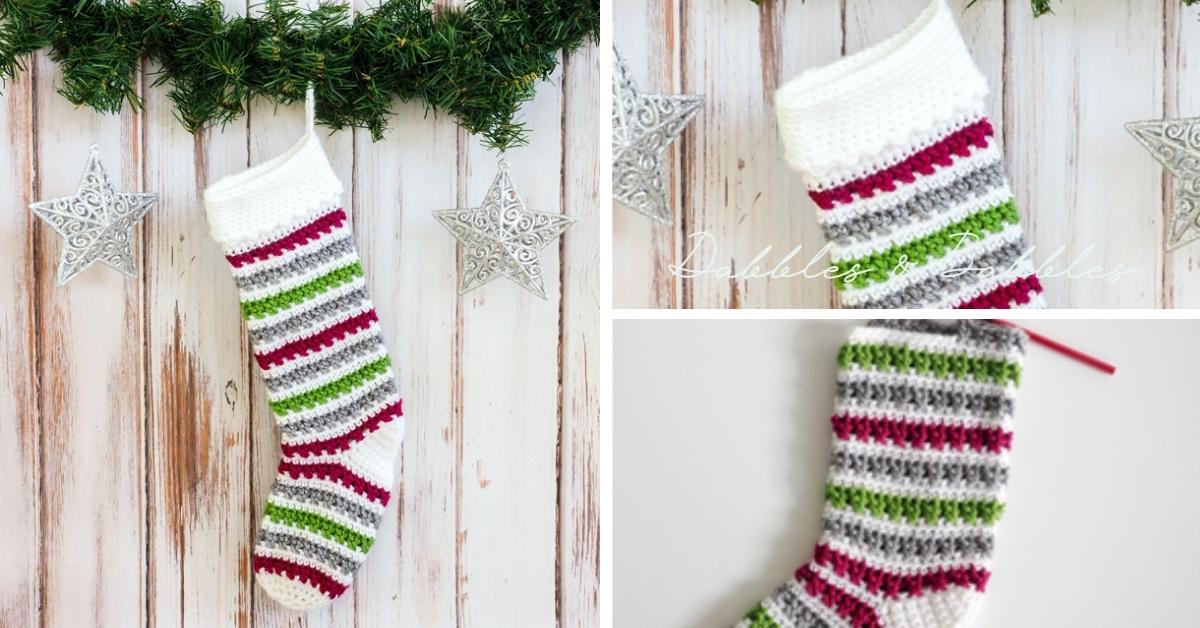
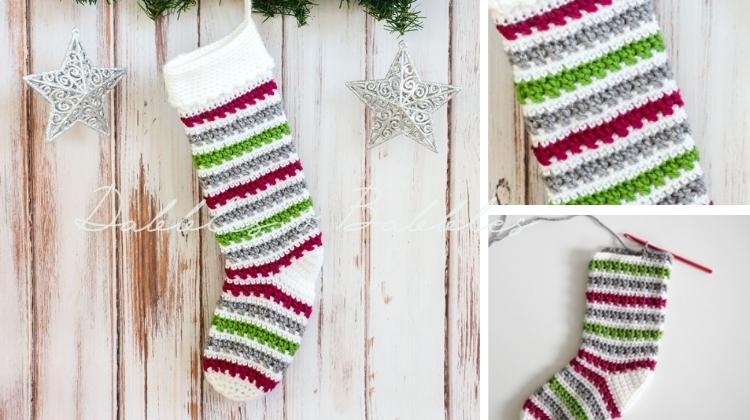
I set about researching patterns and came across this really cute sock pattern by Maria over at Pattern Paradise that looked relatively easy. After reviewing the pattern, I thought I’d give it a try, turning it from sock into a Christmas stocking crochet pattern. Maria’s crochet pattern is super easy to understand and she goes into great detail and has nice photos to help with the dreaded heel. Seeing as I wasn’t mobile yet I had to use the colors I had on hand so I came up with this slightly unconventional Christmas color palette but I think it works.
This crochet stocking pattern may look complicated but trust me, once you get in the rhythm, you could practically do it in your sleep. I never bother with complicated patterns so I wouldn’t have bothered finishing this if it was too challenging.
It took me two evenings to make it so it’s not a huge investment in your time. I love the new crocheted Christmas stocking for our cat (Milo is ever so excited) and think it will be a wonderful addition to our mantle.
Crochet Christmas Stocking Pattern
TERMINOLOGY: Pattern in U.S. crochet terminology
SKILL LEVEL: MEDIUM but definitely not hard
MATERIALS:
- Crochet Hook: The original pattern calls for a US I/5.50mm but in the end I think a US J/6.00mm would give the sock a little extra size – better for a stocking.
- Worsted weight size 4 yarn – 4 skeins each in 4 different colors – approx. 80 yards in white, 40 yards in each of the 3 colors.
- Darning needle & scissors
Size: From toe to heel 7″ long, from heel to top of the sock (when folded over) 10″, 4.5″ wide.
Abbreviations:
- st = stitch
- ch = chain
- sl = slip stitch
- sc = single crochet
- dc = double crochet
- sc2tog = single crochet 2 stitches together
- Xst = Modified X Stitch
- Color A = Color choice 1
- Color B = Color choice 2
- Color C = Color choice 3
- Color D = Color choice 4
Special Stitch: Modified XSt – X Stitch – Worked over two stitches crossing the second stitch in front of the first stitch and encasing the first stitch within it – think of it as the second stitch hugging the first stitch! Skip next st, dc in next stitch, working around stitch just made, work dc in skipped stitch.

Notes:
- Weave ends as you work
- Ch1 at beginning of round/row does not count as a stitch.
- Stitch count is in ( ) at end of the round. Stitch count is the same as the previous round unless noted.
- Work instructions in [ ] as designated
- When a number precedes a stitch, such as 3hdc, work that number of stitches in the next stitch.
Tips:
- Join each round with sl st to first st. Start each round in the join.
- Do not fasten off at each color change, instead carry the unused color along inside.
- Make color change in last pull through of last st before the color change.
- Refer to Maria’s slipper sock pattern here if you’re having any challenges.
Pattern
Round 1: Color A, Ch2 (does not count as st), 8hdc in 2nd ch from hook, join. (8)
Round 2: Ch1, 2hdc in each st around, join. (16)
Round 3: Ch1, [2hdc, hdc] repeat around, join. (24)
Round 4: Ch1, [2hd, hdc next 2] repeat around, join. (32)
Round 5: Color B, Ch3, dc in next st to the RIGHT (beg XSt made), working in the usual direction, XSt around to end, join. (16 XSt)
Rounds 6 – 7: Color A, Ch1, sc in each st around, join. (32)
Round 8: Color C, Ch3, dc in next st to the RIGHT (beg XSt made), working in the usual direction, XSt around to end, join. (16 XSt)
Round 9 – 10: Color A, Ch1, sc in each st around, join. (32)
Round 11: Color D, Ch3, dc in next st to the RIGHT (beg XSt made), working in the usual direction, XSt around to end, join. (16 XSt)
Round 12 – 13: Color A, Ch1, sc in each st around, join. (32)
Round 14: Color C, Ch3, dc in next st to the RIGHT (beg XSt made), working in the usual direction, XSt around to end, join. (16 XSt)
Round 15 – 16: Color A, Ch1, sc in each st around, join. (32)
Round 17: Color B, Ch3, dc in next st to the RIGHT (beg XSt made), working in the usual direction, XSt around to end, join. (16 XSt)
Round 18: Color A, Ch1, sc in each st around, join. (32)
You will work heel gusset in rows and then continue working remainder of the sock in rounds (see Maria’s photo here to help give you a visual idea of how this works).
Heel Row 1: Ch1, sc in next 18 sts. (18)
Heel Row 2: Ch1, turn, sc in each st. (18)
Heel Row 3: Ch1, turn, sc next 6 sts, sc2tog, hdc next 2, sc2tog, sc last 6 sts. (16)
Heel Row 4: Ch1, turn, sc next 7 sts, hdc next 2, sc last 7 sts. (16)
Heel Row 5: Ch1, turn, sc next 5 sts, sc2tog, hdc next 2, sc2tog, sc last 5 sts. (14)
Heel Row 6: Ch1, turn, sc next 6 sts, hdc next 2, sc last 6 sts. (14)
Heel Row 7: Ch1, turn, sc next 4 sts, sc2tog, hdc next 2, sc2tog, sc last 4 sts. (12)
Heel Row 8: Ch1, turn, sc next 5 sts, hdc next 2, sc last 5 sts. (12)
Heel Row 9: Ch1, turn, sc next 3 sts, sc2tog, hdc next 2, sc2tog, sc last 3 sts. (10)
Heel Row 10: Ch1, turn, sc next 4 sts, hdc next 2, sc last 4 sts. (10)
Heel Row 11: Ch1, turn, sc next 2 sts, sc2tog, hdc next 2, sc2tog, sc last 2 sts. (8)
Heel Row 12: Ch1, turn, sc next 3 sts, hdc next 2, sc last 3 sts. (8)
Continue working in rounds.
Round 19: Ch1, turn, sc2tog, sc next 4 sts, sc2tog, working down side of gusset, work 6sc (approximately one every other row), working along stitches from Round 18, work sc in next 14 sts (you should be at the beginning of the other side of the gusset), work 6 sc up side of gusset, join. (32)
Rounds 20 – 44: Repeat rows 5 – 18 two times, excluding row 5 the second time around (see photo for color change example).
Round 45 – 64: With color A, Ch1, sc in each st around, join. (32). Note: In row 35, at the back edge of the sock, I chained 12 and then slipped stitch back into the same stitch to create a little loop for hanging the stocking but this is completely optional.
Round 65: sc in first st, [Ch 4, slip st into st, sc in next st], repeat across row.
Break yarn, weave in ends.
Download the free Christmas Stocking Crochet Pattern here.
Looking for more great crochet patterns: Outlander Cowl Pattern, Cross Hatch Button-Up Cowl Crochet Pattern, Easy Modern Crochet Patterns, Crochet Beach Bag Pattern, Easy Thick Crochet Wash & Dish Clothes, Crochet Boot Cuffs, Caps for a Cause, Crochet Infinity Scarf, Crochet Cat Bed, Crochet iPhone Case, Easy-Peasy Crochet Beanie, 50+ Cheery Christmas Stocking Crochet Patterns